Categories
Growing

Eggplant Anyone?

While taking a landscaping course recently, I had to identify the colors used in a particular color scheme. One of the colors was ‘Eggplant’ and it got me to thinking about growing eggplants in my greenhouse. I don’t really even know what an eggplant is. Sure, I’ve seen some in the grocery store, but I don’t think I’ve ever seen an eggplant plant. Is it like a pumpkin? Like a pear? Like a pepper? I have no idea. But it sure looks cool! I’ve never tasted it and have no idea even how to cook it, but I’d sure like to try to grow it and find out the answer to all these questions.

So I decided to do a little research. The first thing I discovered is that eggplant is technically a berry! Go figure that one! It seems pretty squash-like to me. Another surprise was that it’s a relative of the tomato. We’ll I’m certainly a fan of berries and tomatoes, so I think I’ll give it a try.

So, where to start? Well, I found this article at DIY Guides that walked me through all the basics of growing eggplants. It seems eggplants should fit right in with my tomatoes and peppers. They need an early indoor start, they like it hot, and should do just fine in my greenhouse. So I think I’ll give it a try.

If you’ve grown eggplants in your garden, let me know! I’d love to hear how it worked!

Categories
Projects

An Inexpensive, Hail Proof, PVC Pipe Greenhouse

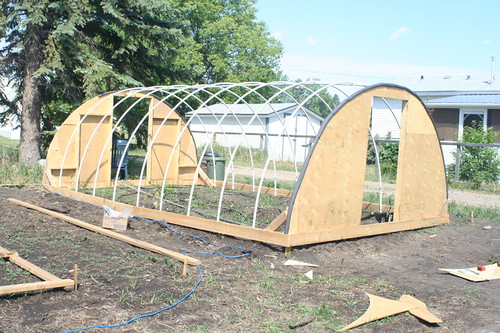
I’ve finally built my greenhouse for my new garden. It’s a twenty by twelve foot hoop-style greenhouse with wooden ends and is covered with 11 mil woven poly. This greenhouse has some pretty cool features that I really appreciate, and I think you will too.

My third hoop style greenhouse

First of all, the poly I used to cover it is fantastic. It is a super tough woven poly that I got from Northern Greenhouse out of Manitoba. How tough is it? Well, my brother (who operates the Saskaberry Ranch near Sundre) just got pounded by hail last Sunday. The hail broke windows, shredded siding, and striped everything off of his saskatoon and raspberry bushes – but his greenhouse covered with this same woven poly was completely undamaged! Amazing! (I’ll try to post a picture if I can get one.)

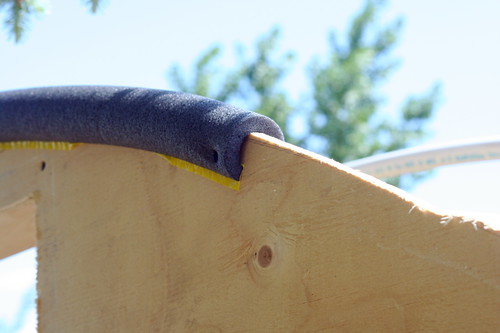
Secondly, to eliminate wear and tear on the plastic, I covered edges of the wooden ends with copper pipe insulation. This foam protects the poly from the sharp edges of the wood.

Insultation on greenhouse

Thirdly, it was very inexpensive and easy to build. The lumber was under $100, the poly was just over $200, and the pvc pipes were under $100. By the time I got all the misc. stuff, I was still under $500 total. Not bad, eh?

My third hoop style greenhouse

Being so late I only got a single row of tomatoes down one side, but next year I’ll be bursting at the seams once again! If you want to build a greenhouse like this one, check out my previous post that gives step by step instructions for building this same greenhouse. Since I’ve improved the design since then, I would recommend the following changes:

  • Use wooden ends instead of plastic – and cover the ends with pipe insulation.
  • Use 11 mil woven poly instead of the 6 mil.
  • Put the PVC pipes on the inside of the frame rather than on the outside

Other than that, you should be able to follow all the other steps. If you do follow this design, be sure to leave me a comment – I’d love to hear (and see) what you’ve been doing!

Categories
Growing Just Photos

Better Late Then Never

After getting started tremendously late (due to landscaping issues), my garden isn’t looking too bad – all things considered. My corn and beans are growing nice. Peas… not so much. After the birds pecked them to nothing they’ve been slow to recover. I might get a taste, but certainly not anything for the freezer. Carrots…well, let’s just say that their current average height is about one inch. Radishes grew tall, flowered, and had nothing to show for it at the bottom.

But potatoes…. Now they might do something. I’ll at least have a good stock of baby potatoes if nothing else.

Potato flowers

Now that my greenhouse is up, my tomatoes are coming along too. I’ve got some good golfball+ tomatoes right now and lots of flowers.

Tomato Flowers in my greenhouse

And of course, old reliable. The one that never fails. Rain or shine, sheet or hail. Nothing can stop… the weeds! But at least something is growing. And they’re kinda pretty too.

Pretty Weeds

Categories
Upick Farm Review

BillyCo Junction Upick

A few weeks ago I had a real hankerin’ for some strawberries. I checked into my regular favorite upick farms, but no one was quite ready yet. So I searched  the Alberta Farm Fresh Producers Associate Website for strawberry growers in my area. An lo, and behold, what should I find but a brand new upick farm. Billyco Junction, just east of Lacombe, had just opened for the first time ever. So off we headed to Billyco Junction.

My Experience

For a brand new upick farm, I must say I was very impressed. It seems they are well on their way to a successful upick farm. The first thing I noticed was their lovely yard. Everything was well kept and looking sharp. The same could be said about their fields, which leads me to the second thing I noticed: They have a little bit of everything! Fruits and vegetables galore! Just take a look at their website under ‘Garden Delights’ for a list of all that they have and plan to have – www.billycojunction.com

But on this occasion I was on the hunt for strawberries and Billyco Junction was just the only place I could find at this time of year that had them. In fact, I happened to call on their opening day. I arrived after supper and unfortunately they had already been picked clean by the day’s customers. That was a little disappointing, but certainly understandable since they were the only ones open for the season yet. But I returned a few days later and there was no lack of berries.

Billyco Junction Upick

It didn’t take very long to fill my basket (with the help of my kids). We were picking from newly planted strawberries, so the berries were a little smaller than what you would find on the second year strawberries. They were also planted in plastic mulch and had not yet been mulched with straw, so the berries were a little dirty. However, had I been just a week or two more patient, we could have been picking from the established and straw mulched berries and had larger, cleaner berries. But what can you do when you have a hankerin’ for strawberries before they’re ready? I’ll tell you… You take what you can get.

One things that I appreciate about Billyco Junction is the owners. Bill & Edie Biel are well suited for the upick business – friendly, helpful, and there when you need them! Even on the day when I came late and the berries were gone, Edie kindly took me on a small tour of their operation.

There were just a few things that are currently lacking – and I’m sure as they get a bit of experience under their belt these things will be shortly forthcoming. Parking is one – as we drove into their yard we didn’t really know where we should be parking. A sign or two would be helpful here. The other is washroom facilities. I didn’t inquire, but I didn’t notice any public washroom facilities. But like I said, I’m sure it won’t be long before these things are taken care of.

A Final Word

If you are in the Lacombe area, this is one upick farm to watch. They have already done so many things right and they’ve only been running for less than a month! With a little bit of time and experience, I am confident that Billyco Junction will become a premier upick site. I’ve already been their twice and a couple more trips this season seem to be in order! Check ’em out for yourself!

Want to Visit Billyco Junction?

Here’s what you need to know:

Location:

East of Lacombe on Highway 12, approximately 8 km to Prentiss Road. Go south on Prentiss Road, approximately 4.4 km. Billyco Junction is on the west side of the road.

Prices:

At  the time of this article, strawberries were $3.00 per lb.

Other Info:

You can visit their website at http://www.billycojunction.com or give them a call at (403) 782-4263.

Categories
Haskap

Haskap / Honeyberry Pictures (After Three Years)

As promised earlier, here are a few haskap/honeyberry pictures. These were four inch seedlings about three years ago. They have been grossly neglected, but they seem to be doing just fine. This is the first year to get a significant crop of berries.

Honeyberries

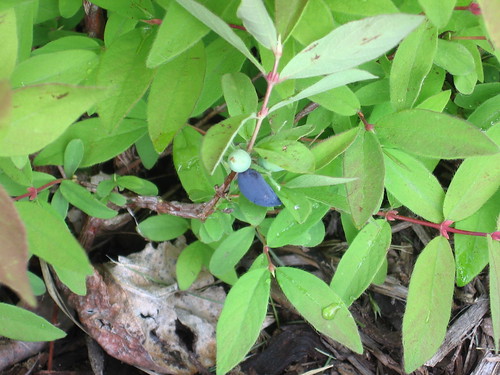
A close up of a berry.

Haskap Berries

Not so close up of several berries – I see about 12 ripish berries.

Three year old Haskap

This is right on the southwest side of the deck – it’s a solid three feet tall.

Three year Old Honeyberries

This is out kinda in the middle of the lawn. It’s starting to make a nice hedge.

Categories
Haskap

Haskap/Honeyberries 2009 Update

All I can say is WOW! These haskap are amazing! As most of you know, I moved last summer and had to leave behind my haskaps just as they were starting to produce. I got a few small handfulls from my two dozen plants. Well, just yesterday I went back to visit my brother-in-law (who now lives at my old place) and saw the haskap. I was blown away! The plants had more than doubled in size this year and were covered in little berries. Most were green still, but there were some ripe enough for a taste test. It was a slow start, but wow what a jump from 2008 to 2009! I’ll certainly be planting more haskap at my new place!

Haskap Berries

Sorry about the old picture – this is actually a picture of last year’s berries. I didn’t have my camera with me on this trip, but I’ll sure try to get out there again for a few pictures!

Categories
landscaping

Stump Grinders: A Necessary Evil

The next step in landscaping our yard was removing the four large stumps from what would soon become the garden. We had two maple stumps and two poplar stumps. So we rented a stump grinder (to the tune of $160) and went to work. And boy, oh boy, was it ever work! The stump grinder worked great, but it sure took a lot of muscle, a lot of time, and a lot of dirt in the face.If you’ve never used one before – imagine it as a cross between a chainsaw and a rototiller.

Stump Grinder

My brother-in-law was kind enough to help and so we were able to take turns running the machine. All said and done it took an average of a little over one hour per stump. Oh, and of course, the handle on the pull cord broke off, so we had to…. [things that our rental agreement said not to do…], but my neighbor is a small engine mechanic so he saved the day and another $160 for us!

Now with the stumps gone, four holes in the ground, and a whole pile of mulch – it’s time to move some dirt around. Who knows – I may just get a late garden in after all!

Categories
Garden Plans

A New Home – A New Garden

Last summer I bought a new house – as I’ve eluded to in some of my recent comments (and as evidenced my my lack of new posts since last August). The house had just been moved in and placed on a new basement, so there had been no landscaping done after the excavation and most of the back yard was still in it’s undisturbed state (as it had been for the past… 50 – 100 years?) There were a few rotting trees that were eager to fall on the power lines, so we decided it best to remove them even though it left us with a pretty bare yard.

We wanted to live in the house for a while before we made landscaping plans so we would know what exactly we wanted, so we didn’t do much in the way of landscaping last fall, except for removing the previously mentioned trees. Of course, with no garden I really didn’t have much to write about, so that’s why I’ve been a little absent (though I’ve enjoyed replying to your comments on my other articles).

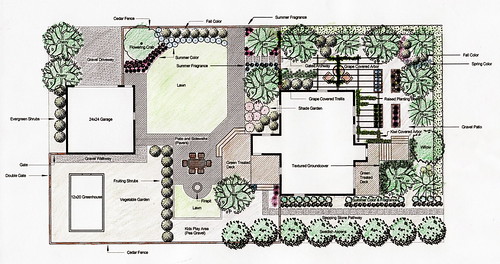
But here’s the good news… I’m back! Over the winter I drew up a concept plan for our yard (seen a little further on in this article) and we are now working to making it all happen. Hopefully, as I keep you updated on my progress, you’ll see some dramatic changes. So to fully appreciate the before and after, here are a couple of before pictures:

This is in April, scraping back the black dirt… (Looking out from my back steps)

Scraping back the black dirtThen this is earlier today… (looking towards the house from the back alley)

Before LandscapingSo it’s a pretty empty slate, but with lots of possibilities. Here’s what I plan to do with it:

Concept Plan

I’m going to be a bit late planting in the garden this year, but that & the greenhouse are my #1 priority. (Hey, you might get another tutorial on how to build a greenhouse.) But that’s for another day!

Categories
Just Photos

Hoop Frame Greenhouse in New Zealand

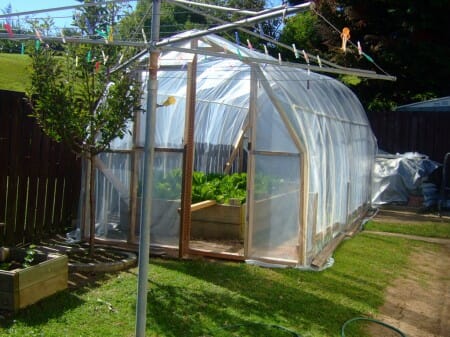
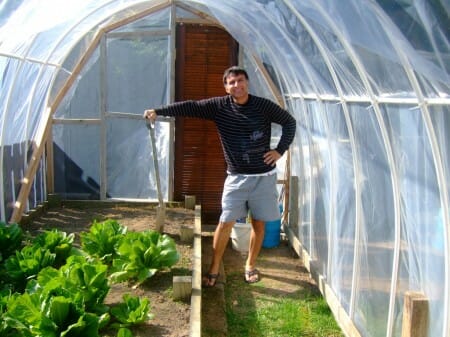
It seems everyone is in the greenhouse building mode! Ok, well, maybe not EVERYONE, but many are. I’m still working on plans for my next  greenhouse, but until then I wanted to show you another greenhouse that was built from my plans in my article “How to Build an Inexpensive Hoop-Style Greenhouse“. This one is from Farshid out of New Zealand. It took him three afternoons to build (after work that is), and cost about $200 NZ – that’s about $137 Canadian.

Hoop Frame Greenhouse in New Zealand

Hoop Frame Greenhouse in New Zealand

Thanks Farshid! Looks great!

Categories
Hints, Tips, and How Tos

My “Inexpensive Hoop-Frame Greenhouse” Design in Nova Scotia

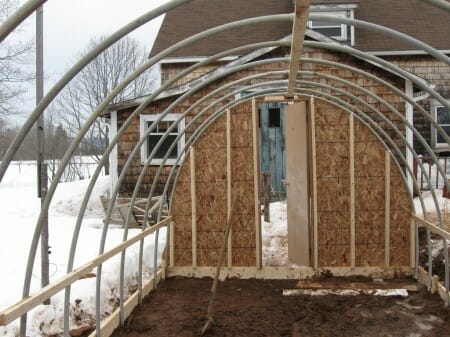
Recently I received a comment on my post “How to Build An Inexpensive Hoop-Frame Greenhouse” from Stacy in Nova Scotia. Using the design she found at AlbertaHomeGardening.com, she built a 10 x 22 greenhouse. I asked her to send along a few pictures and she did. So I thought it would be good to share them with you to show you another example of how you too can build your own greenhouse. So here is her comments and her pictures. Thanks Stacy!

Well, we just built this greenhouse, with a few changes, we made ours 10×22. We put a piece of strapping 2 feet off the floor running the length of the greenhouse to sturdy it up. We also used strapping in the top centre (instead of pipe and zip ties)attached to the hoops with the metal electrical bands , we got a box of 50 for 8$.

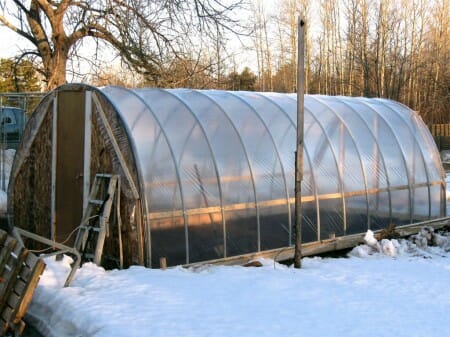
Nova Scotia Hoop-Frame Greenhouse
It was complete in 2 days! Its wonderful! When we bought our farm it came with a huge pile of electrical conduit, enough for 3 or 4 of these greenhouses. We plan to build another very soon. We couldn’t have been happier to find this design! Good job!

Nova Scotia Greenhouse
It is now full of many vegetables, flowers and herbs getting ready for the upcoming season.
Happy gardening,
Stacy